Author Archives: jeremy@socialcali.com

Retaining Wall

How to Design a Retaining Wall for Maximum Effectiveness

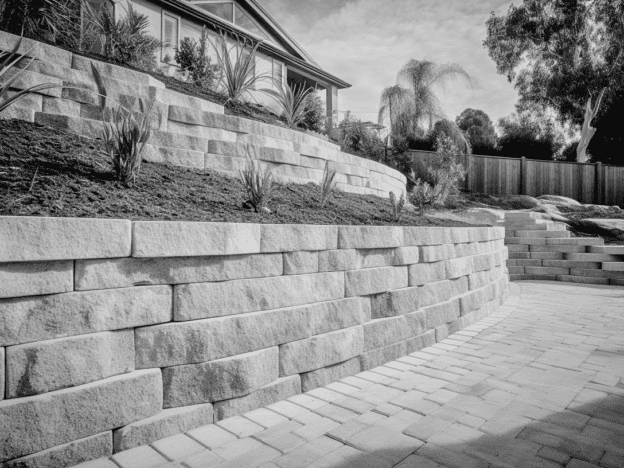
Designing a retaining wall isn’t just about stacking stones or blocks—it’s a crucial element in landscape architecture that can significantly influence the functionality and aesthetics of your outdoor space. Whether you’re tackling a steep slope or creating a level area in your garden, understanding how to design a retaining wall for maximum effectiveness can make all the difference.This guide will delve into the essential steps and considerations for crafting a retaining wall that stands strong and.

Choosing Materials for Your Retaining Wall

Selecting the right materials is fundamental when designing a retaining wall. Different materials offer varying strengths, aesthetics, and costs. For a sturdy and durable structure, options like concrete blocks, natural stone, and timber are popular. Concrete blocks are versatile and come in various styles, making them ideal for modern designs.

Natural stone, while more expensive, provides a timeless, rustic look that blends seamlessly with natural landscapes. Timber can be an economical choice but may require more maintenance over time due to weathering. Each material has its own benefits and drawbacks, so consider factors like the wall’s purpose, local climate, and the overall design of your space.

Retaining Wall Structural Requirements

A retaining wall must be built to withstand the pressure exerted by the soil it holds back. This requires careful attention to structural requirements to ensure stability and longevity. The design should include a solid foundation that can support the weight of the wall and the load behind it. The wall must also be built with proper reinforcement, whether through concrete footings or steel reinforcements, to prevent collapse. 

Understanding local building codes and regulations is crucial, as they provide guidelines to ensure the wall’s safety and compliance. Consulting with a structural engineer or a professional designer can provide valuable insights and ensure the wall’s design meets all necessary criteria for stability and durability.

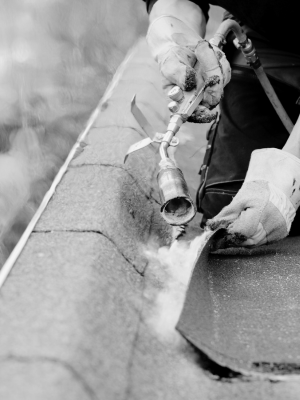
Essential Drainage Solutions for Stability

Effective drainage is vital for the stability of a retaining wall, as improper water management can lead to structural failure. Implementing the right drainage solutions helps maintain the wall’s integrity over time.

  • Weep Holes: These small openings allow water to escape from behind the wall, reducing hydrostatic pressure and preventing potential damage. Properly spaced weep holes are essential for effective water management.
  • Drainage Pipes: Installing drainage pipes at the base of the wall helps channel water away from the foundation. These pipes should be sloped to ensure efficient water flow and prevent accumulation.
  • Gravel Backfill: A layer of gravel or crushed stone behind the wall promotes drainage by allowing water to pass through easily. It also helps prevent soil from clogging the drainage system.
  • Drainage Fabrics: Geotextile fabrics placed behind the wall keep soil particles from entering the drainage system. This helps maintain the effectiveness of weep holes and drainage pipes.
  • Proper Sloping: Ensure the land slopes away from the wall to direct water flow naturally. This reduces the amount of water that accumulates behind the wall and minimizes erosion.

By integrating these drainage solutions, a retaining wall can remain stable and functional for years to come. 

Designing for Aesthetic Appeal and Function

A retaining wall serves both practical and visual purposes, so striking a balance between function and aesthetics is key. Start by considering how the wall will fit into your overall landscape design. The choice of materials, color, and texture should complement your home’s architecture and surrounding environment. 

For a more polished look, you might choose materials that match or contrast with existing features like patios or pathways. Incorporating elements such as planters or seating areas into the wall design can enhance its functionality and appeal. A well-designed wall can elevate the look of your outdoor space while providing practical benefits.

Calculating the Right Height for Your Wall

Determining the appropriate height for a retaining wall involves careful consideration of both structural and aesthetic factors. The height of the wall should be based on the amount of soil it needs to retain and the overall design of your landscape. Generally, walls over one meter high may require additional engineering to ensure stability. For taller walls, it’s crucial to consult with a professional to assess the necessary reinforcement and construction techniques. 

Additionally, consider how the wall’s height will affect your outdoor space’s usability. A taller wall might create more usable flat space but could also impact views or privacy. Balancing these factors will help you design a wall that meets both practical needs and aesthetic goals.

Incorporating Landscaping Elements with Retaining Walls

Integrating landscaping elements with a retaining wall can significantly enhance both functionality and aesthetics. 

  • Planters: Built-in planters can soften the wall’s appearance and create lush, green spaces. Choose plants that complement the wall’s material and suit the local climate for a harmonious look.
  • Steps: Adding steps to the retaining wall allows for easy access between different levels of your yard. Ensure the steps are designed for safety and comfort, with proper footing and handrails if needed.
  • Seating Areas: Incorporating seating into the wall can transform it into a functional outdoor feature. Use comfortable materials and design to create inviting spots for relaxation and socializing.
  • Lighting: Integrate lighting into the retaining wall design to highlight its features and enhance safety. Well-placed lights can create a dramatic effect and make the space usable even at night.
  • Water Features: Incorporating a water feature such as a small fountain or waterfall can add tranquility and visual interest. Ensure proper installation to manage water flow and prevent damage.

Incorporating these elements into a retaining wall not only improves its functionality but also enhances the overall beauty of your outdoor space.

Addressing Soil and Erosion Concerns Effectively

Properly managing soil and erosion is crucial for the longevity of a retaining wall. Erosion can undermine the wall’s foundation, leading to structural issues or failure. To combat this, implement soil stabilization techniques such as planting ground cover or using erosion control fabrics. 

Ground cover plants can help bind the soil and reduce runoff, while erosion control fabrics provide an additional layer of protection. Additionally, ensure that the wall’s design includes proper drainage to prevent water accumulation behind it. Regular maintenance, including checking for signs of erosion and addressing any issues promptly, will help preserve the wall’s effectiveness and extend its lifespan.

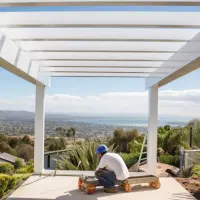
Planning for Long-Term Maintenance and Care

Maintaining a retaining wall involves more than just initial construction; it’s an ongoing process to ensure its durability and appearance. Regular inspections are essential to check for any signs of wear, such as cracks or leaning. Address any issues promptly to prevent them from worsening. 

Depending on the material used, maintenance tasks might include cleaning, resealing, or reinforcing the structure. Incorporating a maintenance plan into your overall landscape care routine will help keep your retaining wall in optimal condition and prolong its life.

Customizing Retaining Walls to Your Space

Customisation allows a retaining wall to perfectly fit its environment and your specific needs. Consider the unique characteristics of your space, such as slope, soil type, and existing landscape features, to tailor the design accordingly. Custom walls can be shaped and styled to blend seamlessly with the natural terrain or to create striking visual contrasts. Incorporating custom elements such as specific materials, colors, or patterns can make the wall a standout feature in your landscape. 

Tailor the wall’s function to meet your needs, whether it’s creating more usable outdoor space, improving drainage, or simply adding visual appeal. A well-customized retaining wall not only enhances the functionality of your yard but also complements and elevates the overall design.

Enhancing Safety Features in Your Retaining Wall

Enhancing safety features in a retaining wall is crucial to prevent accidents and ensure durability. Incorporating the right safety elements can protect both the wall and the people around it.

  • Reinforce the Foundation: Strengthen the wall’s base with additional footings or reinforcements to prevent collapse under pressure and maintain stability over time.
  • Install Guardrails or Barriers: For tall retaining walls or those near high-traffic areas, adding guardrails or barriers can prevent falls and accidents, especially in areas where people are likely to come close.
  • Design Non-Slip Surfaces: Ensure the wall’s surface is textured or treated to reduce the risk of slipping, particularly in wet conditions or areas with heavy foot traffic.
  • Regular Inspections: Conduct routine inspections to check for signs of wear, cracks, or structural issues, addressing any problems promptly to maintain safety and integrity.
  • Improve Drainage Systems: Effective drainage reduces water pressure behind the wall, preventing erosion and potential structural failures that could pose safety risks.

Prioritizing these safety features will ensure the retaining wall remains a secure and functional part of your landscape. 

Designing a retaining wall with maximum effectiveness involves thoughtful consideration of materials, structural requirements, and aesthetics. From choosing the right materials to implementing essential drainage solutions, each step is crucial for creating a durable and visually appealing structure. Proper planning ensures the wall not only serves its purpose but also enhances the overall landscape design.

For expert guidance and custom solutions tailored to your needs, contact Tidal Remodeling at +1 (760) 990-7890. Transform your outdoor space with a retaining wall designed for both function and style.

Flat Roofing

Maintenance Tips for Flat Roofing to Prevent Common Issues

Flat roofing offers a sleek and modern look, but without proper upkeep, it can quickly turn into a maintenance headache. Flat roofing systems, while popular for their simplicity, are prone to specific issues such as ponding water, leaks, and membrane damage. Regular maintenance is essential to ensure longevity and performance.

Understanding how to manage these common problems can save significant time and money. Simple actions like routine inspections, cleaning debris, and checking for signs of wear can make a huge difference.

Key Signs Your Flat Roofing Needs Attention

Recognising the early signs of damage can prevent major issues with flat roofing. Monitoring these indicators helps in addressing problems promptly, saving time and money in the long run.

  • Water Stains on Ceilings: Discolored patches or water stains on the ceiling often signal leaks or water damage in the flat roofing system, necessitating immediate inspection and repair.
  • Pooling Water: Persistent water accumulation on the roof can lead to deterioration and leaks. Ensure proper drainage and address any blockages or structural issues causing water to pool.
  • Cracks or Blisters: Visible cracks or blisters on the roofing membrane indicate potential damage. These areas need prompt repair to prevent water infiltration and further damage.
  • Debris Accumulation: Leaves, branches, and other debris can block drainage systems and cause water to pool. Regularly remove debris to maintain proper roof function and prevent damage.
  • Unusual Odors: Foul or musty smells emanating from the roof area may indicate mold or trapped moisture. Investigate and resolve the source to prevent further issues.

By staying vigilant and addressing these signs early, flat roofing can be maintained effectively, avoiding costly repairs and ensuring long-term durability.

Effective Strategies to Prevent Ponding Water

Ponding water is a significant concern for flat roofs, as it can lead to various issues such as leaks and roof degradation. One effective strategy to prevent ponding is ensuring proper drainage systems are in place. Roof drains, scuppers, and downspouts must be clear and functional to facilitate water flow off the roof. 

Installing tapered insulation can also help, as it promotes better water runoff by creating a slope. Additionally, routinely checking for debris and cleaning the roof surface helps prevent blockages that could obstruct water flow. Addressing these issues proactively will significantly reduce the risk of ponding water and its associated problems.

Essential Tools for Flat Roofing Care

Maintaining a flat roof requires specific tools to ensure the job is done correctly and efficiently. A quality roof brush or broom is essential for removing debris and leaves that can obstruct drainage systems. A pressure washer can be useful for deep cleaning the roof surface and removing stubborn stains. 

For inspecting and repairing minor issues, having a reliable roofing repair kit, which includes sealants and patches, is crucial. Safety equipment such as harnesses and non-slip footwear also plays a vital role in ensuring safe access to the roof. By having these tools on hand, maintaining a flat roof becomes more manageable and effective.

How to Spot Early Signs of Damage

Detecting early signs of damage on your flat roof can prevent costly repairs and extend its lifespan. Regular inspections help identify potential problems before they escalate.

  • Cracks and Splits: Check for visible cracks or splits in the roofing material. These can indicate structural issues or damage that needs prompt attention to prevent leaks.
  • Pooling Water: Look for areas where water collects on the roof. Ponding water can cause deterioration of the roofing materials and lead to leaks or other damage if not addressed.
  • Blisters and Bubbles: Inspect for blisters or bubbles on the roof surface. These usually signal trapped moisture or faulty installation that could compromise the roof’s integrity.
  • Stains and Discolouration: Inside the building, monitor for water stains or discolouration on walls and ceilings, which often indicate leaks originating from the roof.
  • Damaged Seams and Edges: Examine the seams and edges of the roof for any signs of separation or wear. Properly maintained seams are crucial for preventing water infiltration.

Identifying these signs early can save time and money on repairs. Regular inspections and prompt action are key to maintaining a well-functioning flat roof.

Importance of Regular Flat Roofing Inspections

Regular inspections are crucial for the upkeep of flat roofing. Over time, weather conditions and general wear and tear can cause issues that might not be immediately visible. By scheduling regular inspections, it’s possible to identify and address potential problems before they escalate. 

Professional inspectors can assess the roof’s condition, checking for common issues like leaks, membrane damage, and drainage problems. Routine inspections also allow for early detection of minor issues that could develop into more significant problems if left unattended. Investing in regular checks ensures that the flat roof remains in good condition, thereby extending its lifespan and preventing unexpected repair costs.

Common Mistakes in Flat Roofing Maintenance

Maintaining a flat roof can be straightforward, but several common mistakes can lead to costly issues. One frequent error is neglecting to clear debris from the roof, which can block drainage systems and cause water to pool. Another mistake is using improper repair materials or techniques, which can lead to ineffective fixes and further damage. 

Additionally, failing to address minor issues promptly can result in more significant problems down the line. It’s also important not to ignore the importance of professional inspections; attempting to handle complex issues without expert help can lead to inadequate repairs. Avoiding these mistakes is essential for effective flat roofing maintenance.

Top Solutions for Membrane Cracks and Tears

Membrane cracks and tears are common issues with flat roofing that need timely attention. One effective solution is applying a high-quality roofing sealant specifically designed for membrane repair. These sealants can fill in cracks and prevent further water infiltration. For more significant tears or damage, a roofing patch might be necessary. 

This involves cutting a piece of roofing material to fit over the damaged area and securing it with adhesive. Reinforcement with roofing fabric can also be beneficial for added durability. Ensuring the area is clean and dry before applying any repair material is crucial for achieving a long-lasting fix. Addressing these issues promptly helps maintain the roof’s integrity.

Choosing the Right Sealants for Flat Roofing

Selecting the appropriate sealant for flat roofing is vital for effective maintenance and repair. Look for sealants that are specifically formulated for flat roofs, as they are designed to accommodate the unique needs of these surfaces. Polyurethane and silicone sealants are popular choices due to their flexibility and strong adhesion properties. 

Polyurethane sealants are known for their durability and resistance to water and UV damage, while silicone sealants offer excellent flexibility and weather resistance. It’s important to consider the roof’s material and the nature of the damage when choosing a sealant. Applying the right product ensures a reliable seal and helps extend the roof’s lifespan.

Seasonal Maintenance Tips for Flat Roofing

Seasonal changes can impact the condition of flat roofing, making regular maintenance essential. In autumn, it’s crucial to clear fallen leaves and debris to prevent blockages in drainage systems. Winter maintenance involves checking for ice dams and ensuring that the roof’s drainage system remains unobstructed. During spring, inspect the roof for any damage caused by winter weather and perform necessary repairs. Summer maintenance should include checking for signs of wear from the sun’s UV rays and ensuring that the roof remains clean.

Best Practices for Cleaning Your Flat Roof

Proper cleaning is essential for maintaining a flat roof’s durability and performance. Following best practices ensures that the roof remains in excellent condition, preventing potential issues and extending its lifespan.

  • Remove Debris Regularly: Clear leaves, branches, and other debris using a roof brush or broom. This helps prevent blockages in the drainage system and reduces the risk of water damage.
  • Use a Pressure Washer Carefully: For stubborn dirt and algae, use a pressure washer. Adjust the pressure settings to avoid damaging the roofing material while thoroughly cleaning the surface.
  • Inspect for Damage: After cleaning, check the roof for any signs of damage such as cracks or tears. Addressing these issues promptly can prevent further deterioration.
  • Check Drainage Systems: Ensure that gutters and downspouts are clear of debris. Proper drainage is crucial to avoid ponding water, which can lead to leaks and structural damage.
  • Schedule Regular Cleanings: Establish a routine cleaning schedule to maintain the roof’s condition. Regular maintenance helps to identify potential problems early and keeps the roof in optimal shape.

By adhering to these practices, the flat roof will remain in good condition, reducing the risk of costly repairs and maintaining its durability over time.

Maintaining a flat roof requires vigilance and regular care to prevent common issues and extend its lifespan. From identifying early signs of damage to implementing effective strategies for water management, attention to detail is crucial. Regular inspections, choosing the right sealants, and addressing seasonal concerns are all essential steps in preserving the integrity of a flat roof. 

For those looking for professional assistance, Tidal Remodeling offers expert advice and quality service to ensure that flat roofing remains in top condition. For comprehensive maintenance and repair solutions, contact Tidal Remodeling at +1 (760) 990-7890. Don’t wait for minor issues to become major problems—reach out today for expert help.

Insulation

The Cost of Insulation: Budgeting Tips for Homeowners

When it comes to managing home expenses, insulation often takes a backseat, overshadowed by more immediate concerns. However, getting insulation right can significantly impact long-term savings and comfort. Homeowners frequently overlook how crucial it is to budget effectively for this often overlooked yet vital home upgrade.

Investing in quality insulation not only boosts energy efficiency but can also reduce heating and cooling costs over time. By understanding the costs associated with different types of insulation and exploring various installation options, homeowners can make informed decisions that fit their financial plans. This guide delves into practical tips to help navigate insulation costs and ensure a wise investment in home comfort and energy savings.

Different Types of Insulation Costs

When assessing insulation options, understanding the costs associated with each type is crucial. Different materials and methods can significantly impact your budget and long-term savings. Here’s a breakdown:

  • Fiberglass Batts: These are among the most affordable options, offering reasonable performance at a lower cost. Installation is relatively simple, making them a popular choice for many homeowners.
  • Spray Foam Insulation: Known for its superior air-sealing properties, spray foam is more expensive but provides exceptional energy efficiency. The higher cost can be offset by significant savings on energy bills over time.
  • Rigid Foam Boards: Offering high insulation values, rigid foam boards are ideal for specific applications like basement walls. They are pricier than fiberglass but provide better thermal resistance.
  • Cellulose Insulation: Made from recycled paper, cellulose is cost-effective and environmentally friendly. It offers good thermal performance and can be a budget-friendly choice for various applications.
  • Reflective or Radiant Barriers: These are often used in attics to reflect heat. They are relatively inexpensive and can enhance the performance of existing insulation, making them a cost-effective addition.

Evaluating these options helps in making an informed decision that aligns with both budget and energy efficiency goals.

How Insulation Impacts Your Energy Bills

The effectiveness of insulation directly influences monthly energy expenses. Properly insulated homes maintain more stable temperatures, reducing the reliance on heating and cooling systems. This efficiency translates to lower energy bills. For example, homes with high-quality insulation can cut heating and cooling costs by up to 30%. The initial investment in good insulation pays off over time as energy savings accumulate. 

Effective insulation not only keeps your home comfortable but also contributes to significant reductions in utility costs. Evaluating the impact of insulation on energy bills helps homeowners justify the expense by considering the potential for substantial long-term savings.

Budget-Friendly Insulation Materials to Consider

When working with a tight budget, finding cost-effective insulation materials can make a significant difference. Fiberglass batt insulation, often among the least expensive options, offers a good balance of performance and cost. Cellulose, made from recycled paper, is another budget-friendly choice that provides decent thermal performance and is environmentally friendly. 

Reflective or radiant barriers, while more niche, can be a cost-effective addition in specific situations like attics. Each of these materials provides a way to improve your home’s insulation without breaking the bank. Exploring these options can help homeowners achieve better energy efficiency while staying within budget constraints.

Costs of Insulation Installation Methods

Selecting the right insulation installation method is crucial for managing costs effectively. Various techniques come with their own price tags and benefits, impacting both upfront expenses and long-term savings.

  • Blown-In Insulation: Ideal for retrofitting, blown-in insulation can be cost-effective for existing walls and attics. It requires specialized equipment for installation, which can affect overall costs but offers good coverage and efficiency.
  • Spray Foam Insulation: Known for its superior air-sealing properties, spray foam insulation comes with a higher price point. Its high R-value and ability to seal gaps make it a worthwhile investment for energy efficiency.
  • Fiberglass Batts: One of the most economical options, fiberglass batts are relatively affordable and easy to install. They are well-suited for new constructions or accessible areas but may require professional installation for best results.
  • Rigid Foam Boards: Providing high insulation values, rigid foam boards are used in specific applications like basement walls or exterior insulation. The cost can vary based on thickness and type, offering durability and effectiveness.
  • Reflective or Radiant Barriers: Often used in attics to reduce heat gain, reflective barriers are generally budget-friendly. They work best in hot climates and can be an economical addition to other insulation types.

Understanding these installation methods helps homeowners make informed choices, balancing cost and efficiency to achieve the best insulation solution for their needs.

Hidden Costs in Insulation Installation Projects

Beyond the apparent costs of purchasing and installing insulation, several hidden expenses can arise. For example, preparing the area for installation might involve removing old materials, repairing damage, or addressing moisture issues, all of which add to the overall cost. 

Additionally, some insulation types, like spray foam, may require professional installation, which can be more costly than DIY options. Homeowners should also consider the potential costs of future maintenance or adjustments. Being aware of these hidden costs helps in planning a realistic budget for insulation projects and avoids unexpected financial surprises.

Balancing Quality and Cost in Insulation Choices

Striking the right balance between quality and cost is essential when selecting insulation. Higher-quality materials often come with a higher price tag but can offer better performance, greater energy savings, and longer durability. Conversely, opting for cheaper materials might save money upfront but could lead to higher energy costs or frequent replacements. 

Evaluating the long-term benefits of higher-quality insulation against its initial cost is crucial. Homeowners should consider both immediate expenses and potential future savings to make an informed choice that aligns with their financial and comfort goals.

Long-Term Savings from Proper Insulation

Investing in high-quality insulation can lead to substantial long-term savings. Proper insulation minimizes heat loss in winter and keeps cool air inside during summer, reducing the need for heating and cooling. Over time, these energy savings can offset the initial cost of insulation. 

For instance, a well-insulated home can see significant reductions in energy bills, often recouping the investment within a few years. Additionally, quality insulation can improve overall home comfort and potentially increase property value. Evaluating the long-term financial benefits of proper insulation helps homeowners understand the value of their investment beyond immediate costs.

Insulation Upgrades That Add Home Value

Upgrading insulation can enhance a home’s market value and appeal to potential buyers. Energy-efficient features are increasingly attractive to homebuyers, and superior insulation is a key component. Homes with updated, high-performance insulation often see a boost in value, as it indicates lower future energy costs and increased comfort. 

Certain types of insulation upgrades, such as those improving soundproofing or environmental sustainability, can make a property stand out in the market. Investing in insulation not only improves the home’s performance but can also contribute to a higher resale value, making it a smart investment for homeowners.

Planning for Insulation Maintenance Expenses

While insulation typically requires minimal maintenance, planning for potential expenses is still important. Over time, insulation can settle, shift, or become damaged, which may necessitate repairs or replacements. Some types of insulation, like spray foam, may need occasional checks to ensure they continue to perform effectively. 

Regular inspections can help identify any issues early, preventing more costly repairs later. Factoring these potential maintenance costs into the overall budget ensures that homeowners are prepared for the long-term upkeep of their insulation, helping to maintain its efficiency and effectiveness over time.

Financial Benefits of Insulation for Older Homes

Upgrading insulation in older homes offers significant financial advantages, leading to improved energy efficiency and reduced utility bills. This investment not only enhances comfort but also adds value to the property.

  • Lower Energy Costs: Updated insulation helps retain heat in winter and cool air in summer, leading to reduced energy consumption and lower utility bills.
  • Increased Property Value: Modern insulation can make an older home more appealing to buyers, potentially increasing its market value and resale potential.
  • Enhanced Comfort: Proper insulation minimizes drafts and temperature fluctuations, improving overall home comfort and reducing the need for frequent adjustments to heating and cooling systems.
  • Reduced Maintenance Costs: Newer insulation materials are less likely to require frequent repairs or replacements, leading to long-term savings on maintenance.
  • Environmental Benefits: Improved insulation contributes to a smaller carbon footprint by reducing the home’s energy consumption and reliance on heating and cooling systems.

Investing in modern insulation for older homes not only provides immediate financial benefits but also enhances long-term value and comfort.

Considering the costs and benefits of insulation is essential for making informed decisions that balance budget and efficiency. By understanding various types of insulation, their impact on energy bills, and the hidden costs involved, homeowners can better plan their investments. Quality insulation not only improves comfort but also delivers long-term savings and can enhance property value. 

For those looking to navigate the complexities of insulation choices and installations, Tidal Remodeling offers expert guidance. Contact Tidal Remodeling at +1 (760) 990-7890 to explore your options and ensure a cost-effective insulation solution tailored to your home. Start enhancing your home’s energy efficiency today with professional advice and support.

Patio Covers

The Impact of Patio Covers on Your Home’s Energy Efficiency

Installing patio covers can significantly enhance your home’s energy efficiency, making them a smart investment. Beyond providing shade and shelter, they create a buffer against the sun’s intense heat, reducing the strain on your cooling systems. This not only improves your home’s functionality but also adds aesthetic value. 

Whether it’s a casual outdoor dining area or a relaxing retreat, a well-designed patio cover contributes to a more energy-efficient and enjoyable home environment. Embracing the benefits of patio covers can lead to a greener, more cost-effective lifestyle.

Enhancing Energy Efficiency with Patio Covers

Installing patio covers can significantly boost your home’s energy efficiency by creating a barrier against the sun’s intense rays. This addition prevents excessive heat from entering your home, especially during the scorching summer months. As a result, your air conditioning system doesn’t have to work as hard to maintain a comfortable indoor temperature, leading to lower energy consumption. Moreover, the shade provided by patio covers reduces the overall temperature around your home’s exterior, which further contributes to a cooler indoor environment.

Additionally, patio covers can be strategically designed to complement your home’s existing architecture, ensuring both functionality and aesthetics are maximized. Materials like insulated panels or reflective coatings can enhance the thermal performance of your patio cover, making it even more effective in energy conservation. 

Benefits of Installing Patio Covers

Installing patio covers offers numerous advantages that enhance both comfort and functionality. These benefits can transform how outdoor spaces are utilized, making them more enjoyable and efficient year-round.

  • Improved Outdoor Comfort: Patio covers provide protection from harsh weather conditions, including intense sun and rain. This creates a comfortable outdoor environment perfect for dining, entertaining, or relaxing regardless of the weather.
  • Reduced Cooling Costs: By blocking direct sunlight and reducing heat absorption, patio covers help lower indoor temperatures. This can lead to decreased reliance on air conditioning, translating into lower energy bills over time.
  • Extended Furniture Lifespan: Outdoor furniture and flooring are protected from UV rays and weather damage when covered. This preservation reduces the need for frequent replacements or repairs, saving money in the long run.
  • Increased Property Value: A well-designed patio cover enhances the aesthetic appeal of a home and adds functional outdoor space. This can make a property more attractive to potential buyers and increase its market value.
  • Enhanced Privacy: Patio covers can create a more private outdoor space, shielding it from prying eyes. This added privacy allows for a more relaxed and enjoyable outdoor experience.

Embracing the benefits of installing patio covers can significantly enhance outdoor living spaces and contribute to overall home efficiency.

Reducing Cooling Costs with Patio Covers

Patio covers play a crucial role in reducing your home’s cooling costs by providing much-needed shade and reducing the heat that enters your living spaces. By blocking direct sunlight, patio covers keep the areas adjacent to your home cooler, which in turn helps to lower the indoor temperature. 

This means that your air conditioning system doesn’t have to work as hard to maintain a comfortable environment, leading to significant savings on your energy bills over time.Moreover, patio covers can be designed with materials that enhance their cooling effects. 

Improving Home Comfort with Patio Covers

Patio covers significantly enhance home comfort by creating a versatile outdoor living space that can be enjoyed in various weather conditions. By providing shade and protection from the elements, they allow you to use your patio more frequently, whether for relaxation, dining, or entertaining guests. 

This expanded living area can be a tranquil retreat during hot summer days or a cozy spot to enjoy the outdoors on rainy afternoons, adding to the overall comfort and livability of your home. Furthermore, patio covers help maintain a consistent indoor temperature by reducing the amount of direct sunlight that enters your home. This not only makes your home more comfortable but also helps to protect your interiors from the harmful effects of UV rays, such as fading of furniture and flooring. 

Patio Covers and Sunlight Control

Controlling sunlight is a key function of patio covers, which can dramatically affect the temperature and light levels in and around your home. By blocking direct sunlight, patio covers reduce the amount of heat that penetrates your living spaces, helping to keep your home cooler during the hot months. This can lead to substantial energy savings, as your cooling system won’t need to work as hard to maintain a comfortable indoor environment. By filtering the sunlight that reaches your outdoor and indoor areas, they can create a more pleasant ambiance and reduce glare, making these spaces more enjoyable to use throughout the day. Some patio covers are adjustable, allowing you to control the amount of sunlight and shade as needed, providing flexibility and enhancing comfort. 

Seasonal Energy Savings with Patio Covers

Seasonal energy savings are a significant benefit of patio covers. They play a key role in regulating temperature throughout the year, making your home more energy-efficient.

  • Summer Cooling: Patio covers block intense sunlight, reducing the heat that enters your home. This decreases the need for air conditioning, leading to lower cooling costs during hot months.
  • Winter Insulation: During cooler months, patio covers act as a barrier against cold winds, helping to retain heat. This insulation effect can reduce heating costs and make your outdoor space more usable.
  • Temperature Stabilization: By providing consistent shade, patio covers help maintain a stable indoor temperature. This reduces the workload on heating and cooling systems, contributing to overall energy savings.
  • Reduced Energy Consumption: The improved temperature regulation from patio covers leads to lower energy consumption. Less reliance on HVAC systems results in decreased energy bills and a smaller carbon footprint.
  • Extended Outdoor Enjoyment: With a patio cover, outdoor areas remain comfortable year-round. This means you can enjoy your patio regardless of the weather, maximizing the use of your outdoor space and adding value to your home.

Incorporating patio covers can lead to substantial seasonal energy savings and enhance your home’s comfort.

Eco-Friendly Living with Patio Covers

Patio covers support eco-friendly living by reducing the energy consumption of your home and lowering your carbon footprint. By providing shade and reducing the need for air conditioning, patio covers help to decrease your household’s energy usage, which in turn reduces greenhouse gas emissions. This makes patio covers an environmentally responsible choice for homeowners looking to contribute to sustainability efforts.

Additionally, patio covers can be made from sustainable materials, further enhancing their eco-friendly appeal. Using materials like recycled metal or sustainably sourced wood ensures that your patio cover is not only functional but also environmentally conscious. The move towards more sustainable living is becoming increasingly important, and patio covers are a simple yet effective way to embrace this change.

Patio Covers and Temperature Regulation

Temperature regulation is one of the primary benefits of patio covers, as they help to maintain a more consistent and comfortable indoor climate. By blocking direct sunlight and providing shade, patio covers reduce the amount of heat that enters your home, making it easier to keep your living spaces cool during hot weather. This natural cooling effect can significantly reduce your reliance on air conditioning, leading to lower energy bills and a more energy-efficient home.

In the winter, patio covers can also contribute to temperature regulation by acting as a barrier against cold winds and helping to insulate outdoor areas. This makes these spaces more usable during the colder months and reduces the amount of heat loss from your home. This enhanced temperature regulation not only improves the livability of your home but also contributes to energy savings and a more sustainable lifestyle.

Maximizing Outdoor Space with Patio Covers

Maximizing outdoor space is a key benefit of patio covers, offering versatile and functional areas for various activities throughout the year. By creating a sheltered environment, these covers enhance outdoor living experiences.

  • Expanded Living Area: Patio covers transform unused outdoor spaces into comfortable areas for dining, relaxing, or entertaining, allowing you to enjoy your backyard in all seasons.
  • Weather Protection: They shield outdoor furniture and spaces from rain, sun, and wind, preventing weather-related wear and tear and extending the lifespan of your outdoor investments.
  • Aesthetic Appeal: A well-designed patio cover complements your home’s architecture and adds a stylish touch, enhancing the overall look and feel of your outdoor areas.
  • Increased Property Value: Adding a patio cover can boost your home’s value by improving its functionality and appeal, making it more attractive to potential buyers.
  • Versatile Use: Patio covers can be customized for various activities, from casual family meals to sophisticated gatherings, making them a practical addition for any lifestyle.

Incorporating a patio cover into your home design maximizes outdoor space, providing both functionality and beauty.

Patio covers offer a wealth of benefits for enhancing energy efficiency and improving overall home comfort. By providing shade and reducing heat absorption, they lower cooling costs and contribute to a more stable indoor climate. Additionally, these covers protect outdoor furniture, extend living spaces, and support eco-friendly living. Whether it’s through controlling sunlight or maximizing outdoor usability, patio covers prove to be a valuable investment in both functionality and aesthetics.

To explore how patio covers can transform your home’s energy performance, contact Tidal Remodeling at +1 (760) 990-7890. Discover the difference a well-designed patio cover can make in your home today.

Turf and Pavers

Understanding the Installation Process for Turf and Pavers

Transforming outdoor spaces into functional and aesthetically pleasing areas often involves the use of turf and pavers. These materials not only enhance the visual appeal but also provide practical benefits, such as low maintenance and durability. Understanding the installation process is crucial for achieving a seamless and long-lasting result.

This guide will delve into the essential steps, from preparing the ground to laying the materials correctly. With the right approach, you can achieve a professional finish that adds value and enjoyment to your outdoor environment.

Choosing the Right Turf and Pavers

Selecting the ideal turf and pavers is crucial for achieving the desired look and functionality of your outdoor space. When it comes to turf, consider factors such as climate, sunlight, and foot traffic. For instance, synthetic turf might be better for high-traffic areas or regions with extreme weather, while natural grass offers a lush, green appearance but requires more maintenance. 

Pavers come in various materials, including concrete, stone, and brick, each with unique benefits. Concrete pavers are durable and cost-effective, while natural stone provides a sophisticated aesthetic. It’s essential to match the style of pavers with the overall design of your outdoor area and consider how well they’ll blend with the surrounding elements. 

Preparing the Ground Properly

Proper ground preparation is the foundation for a successful installation of turf and pavers. Begin by clearing the area of any existing vegetation, rocks, and debris. This ensures a clean surface and prevents any issues with the new installation. Next, check the soil quality; it should be well-drained and free from any excess moisture or compaction. In cases where the soil is too loose or sandy, adding a layer of topsoil can improve stability. It’s also essential to establish the correct level for your project, considering any planned drainage or slope requirements. Properly preparing the ground will create a stable base for your turf and pavers, leading to a more durable and aesthetically pleasing finish.

Essential Tools and Materials Needed

When installing turf and pavers, having the right tools and materials is essential for a smooth and effective process. Here’s a quick rundown of what you’ll need:

  • Shovel or Spade: Essential for digging and removing existing vegetation. A sturdy shovel helps in cutting through soil and turf, making it easier to prepare the area for installation.
  • Turf Cutter: If dealing with large rolls of turf, a turf cutter simplifies the task. It ensures clean, straight edges and reduces manual effort, resulting in a more precise fit.
  • Rubber Mallet: Useful for tapping pavers into place without damaging them. It helps in achieving a level and secure fit, preventing gaps and ensuring a professional finish.
  • Level and Measuring Tape: Critical for accurate layout and alignment. The level ensures even surfaces, while the measuring tape helps in marking dimensions and placing pavers correctly.
  • Plate Compactor: This tool is used to compact the base material, creating a stable and solid foundation. Proper compaction prevents future settling and shifting of both pavers and turf.

Investing in the right tools and materials makes the installation of turf and pavers more efficient and effective. 

Measuring and Marking Your Area

Accurate measurement and marking are key steps in the installation of turf and pavers. Start by using a measuring tape to determine the exact dimensions of the area where the turf and pavers will be laid. Mark the boundaries clearly with stakes and string or spray paint. 

This not only helps in visualizing the layout but also ensures that the installation stays within the desired area. For larger spaces, consider using a laser level to ensure that all marks are level and precise. Proper measurement and marking help in achieving a balanced and symmetrical look, avoiding any misalignment or uneven surfaces in the final project.


Removing Existing Grass and Debris

Before laying down new turf and pavers, it’s important to remove any existing grass, weeds, and debris from the area. Start by using a sod cutter or shovel to lift and remove the grass, ensuring you also take out the root systems to prevent regrowth. Next, clear any stones, sticks, or other debris that might interfere with the installation. 

This step is crucial for creating a clean, even surface for your new turf and pavers. If the area has been heavily overgrown, you might need to use a garden fork or hoe to loosen and remove any remaining roots or compacted soil. A clean surface helps in achieving a smooth and professional installation.

Ensuring Proper Drainage Solutions

Ensuring proper drainage is crucial for maintaining the integrity of your turf and pavers. Effective drainage prevents water accumulation that could lead to damage or instability. Implement these solutions for optimal results:

  • Evaluate Natural Slope: Assess the slope of your area to ensure water flows away from the installation site. Adjustments might be needed to direct water effectively and prevent pooling.
  • Install French Drains: Consider adding French drains, which are perforated pipes surrounded by gravel. These help capture and redirect excess water, reducing the risk of waterlogging and erosion.
  • Use Gravel Trenches: Create gravel trenches around the perimeter to enhance water drainage. The gravel layer allows water to flow through and away from the turf and pavers, preventing potential damage.
  • Lay Landscaping Fabric: Install landscaping fabric beneath the base layers to manage water flow and prevent weed growth. This fabric helps maintain drainage efficiency while keeping the area clean and stable.
  • Check for Proper Drainage: Regularly inspect your drainage system to ensure it functions effectively. Address any issues promptly to maintain optimal drainage and prevent future problems.

Implementing these strategies will protect your turf and pavers from water-related issues, ensuring a long-lasting and visually appealing outdoor space.


Compacting and Leveling the Soil

Once the ground is prepared, compacting and leveling the soil is essential for a stable base for your turf and pavers. Use a plate compactor to compress the soil and create a solid foundation. This step helps in preventing future settling or shifting of the pavers. 

After compacting, check the level of the soil using a long, straight board or level, and make adjustments as needed to ensure a flat, even surface. If any low spots are detected, fill them with additional soil and recompact. Proper compaction and leveling contribute to a smooth and professional finish, ensuring that your turf and pavers remain stable and visually appealing.

Laying the Base Layers Correctly

Laying the base layers is a fundamental step in the installation of turf and pavers. Start by spreading a layer of gravel or crushed stone across the prepared area, which serves as a drainage layer and provides stability. Ensure this layer is evenly distributed and compact it thoroughly using a plate compactor. Next, add a layer of sand or a similar material to create a smooth, level surface for the pavers. 

Use a screed board to level the sand and ensure an even thickness. Properly laying and leveling the base layers is crucial for the stability and longevity of the pavers and for achieving a seamless transition between the turf and paved areas.

Securing Turf and Pavers in Place

To ensure the longevity and stability of turf and pavers, proper securing is essential. For pavers, place each one carefully and use a rubber mallet to tap them into place, ensuring they’re level with the surrounding pavers. Fill the gaps between pavers with joint sand and sweep it into the cracks to lock the pavers securely. 

For turf, trim any excess and secure the edges with landscape staples or adhesive, depending on the type of turf and the surface it’s being installed on. Proper securing prevents shifting and ensures a smooth, well-maintained appearance over time. Regular checks and maintenance will help keep both the turf and pavers in optimal condition.

Finishing Touches and Maintenance Tips

Adding the final touches and staying on top of maintenance are essential for keeping turf and pavers looking pristine. These steps ensure longevity and help maintain the visual appeal of your outdoor space.

  • Regular Cleaning: Sweep pavers frequently to remove dirt, leaves, and debris that can cause staining or damage. For turf, use a leaf blower or broom to keep the surface clean.
  • Check for Damage: Inspect the pavers and turf for any signs of wear or damage. Address any issues promptly to prevent further deterioration and maintain a seamless appearance.
  • Reapply Sealant: For pavers, applying a sealant every few years helps protect against stains and weathering. Follow the manufacturer’s recommendations for best results and long-term durability.
  • Turf Brushing: Regularly brush synthetic turf to prevent matting and keep the fibers upright. This will help maintain a natural look and feel while ensuring optimal performance.
  • Weed Control: Keep weeds at bay by using appropriate herbicides or landscape fabric. Weeds can disrupt the appearance of both turf and pavers, so consistent control is important.

Maintaining turf and pavers with these tips ensures they remain in top condition, enhancing the beauty and functionality of your outdoor area for years to come.

Mastering the installation process for turf and pavers ensures a beautifully transformed outdoor space that’s both functional and enduring. From selecting the right materials to preparing the ground and securing everything in place, each step plays a critical role in achieving a polished and long-lasting result. The effort put into careful planning and execution pays off with a stunning outdoor area that enhances the home’s overall appeal and functionality.

For expert guidance and professional installation, reach out to Tidal Remodeling. Their experienced team is ready to help bring your vision to life with precision and care. Contact Tidal Remodeling today at +1 (760) 990-7890 to start your project